Roll the turf out over a clean flat surface or the prepared base, but make sure not to drag it across the sub-base. Additionally, if you have a seam or another roll of turf, you want to make sure that the fiber blades of artificial turf are going the same direction you had in your planning design so the two pieces match up. It is important to let the artificial turf sit out in the sun for a couple of hours. This allows the fibers to begin to stand upright and relax from being rolled up and will also allow any wrinkles to settle in the backing. Once relaxed, lay your turf accordingly and for areas that will have seams, cut off the un-tufted (selvage) edge (2-3 tuft rows) of each roll and lay them onto the base in your intended direction, then lay your next artificial turf roll adjacent to the first one leaving 1/16-1/8 inch gap between rolls. DO NOT overlap the rolls.

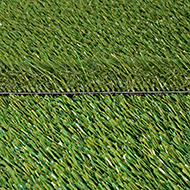

Your turf roll(s) are coming on a 4″ wide cardboard carpet roll 15 feet long and wrapped in protective heavy duty plastic. The weight of your turf is half a pound per square foot. (SQ FT of turf roll divided by 2 = Weight).
WARNING: Although the turf is delivered to the shipping address, make sure that you have enough working crew to help the delivery driver get your turf roll(s) off of the delivery truck.
Whether it is a winding path or an existing new or old border, installing artificial grass can be custom cut to fit your yard. You will need a carpet cutting knife or a razor knife. Most contractors mark the back of the turf with a marker pen where they decide they are going to cut. Once this is accomplished you can roll the turf back and custom cut the turf with your carpet knife. With the area’s that are overlapping, trim the overlapped roll to match the first roll that you trimmed. Your cuts should leave the two pieces as close as possible without actually touching. Then you can trim the turf to match your edges around the borders.

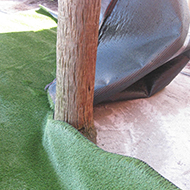
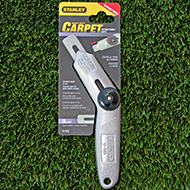
WARNING: DO NOT cut through any of the artificial turf that may be underneath the part you are cutting.
Artificial Turf Supply can supply seaming solution products for your project please contact an Artificial Turf Supply representative. The Adhesive is a single part, moisture curing, polyurethane adhesive designed specifically for bonding various substrates to the backing of synthetic turf. Substrates include: SEAM FABRIC, ROAD BASE, DECOMPOSED GRANITE, CONCRETE, ASPHALT, WOOD, RUBBER TILES and FOAM PADDING.
For those artificial grass projects requiring seams, this is probably the most critical part of the artificial grass installation process in order to make your artificial turf project look realistic. It is always a good idea to practice the seaming process before you seam your project area. Make sure that you take your time when seaming your project. Remember to trim at least one tuft row off of both rolls you’re seaming together.

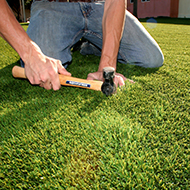
By now your base should be completed and your turf rolled out onto the base. Now mark the areas where your seam will be with a chalk line. Next, you will prepare the turf by cutting both edges of the rolls to be seamed. Using your cutting tool (Seam Row Knife, Carpet Knife or Razor Knife) you want to cut as close to the second tuft row as possible (2-3 tuft rows is okay). This eliminates waste and should give you the proper edges for seaming. Fold back the edges of each turf roll and place the 12 inch seaming tape down (dull side up) on the chalk lines where you will have your seams.
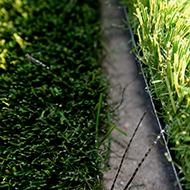


It is important to be accurate when cutting both edges of the turf. The goal is to create the same distance between the tuft rows in the seaming area as in the manufactured area.
Seaming application area should be clean and free of oil and debris. Apply Adhesive to seam tape or surface via trowel, spray rig, glue box, or by simply pouring over the surface area. A light mist or spray of water over the adhesive will accelerate cure time (only a light mist is needed as too much water will cause foaming therefore weakening the bond).
Allow 3-5 minutes wait time for adhesive to absorb surface and atmospheric moisture, then lay down the turf edges. Wait 10-15 minutes then firmly press seam area ensuring contact between both surfaces (weighted roller may be used for field applications).
WARNING: Do not pull on turf as it is bonding as you will re-start the bonding process. Allow seams to cure with atmospheric and surface moisture.
After 25-35 minutes of cure time, press or roll seam area again ensuring contact between both surfaces. Adhesive will be hard enough to begin any brooming after 2-3 hours and be completely cured after 24 hours.
This process should be simple, but any other questions or concerns should be addressed by your Artificial Turf Supply specialist.
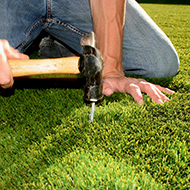
Secure the perimeter with your galvanized sod staples or 6″ inch galvanized nails every 6-10 inches around the edges is one option, but there are a few other options as well.
For securing turf in areas that are curved, typically you would excavate a really narrow trench around the perimeter so that you can then bury the edges of the artificial grass and then you could backfill it with base material, decorative rock, and mulch, straw or other.
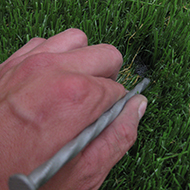

Another option for high traffic areas is to use a 4″ x 4″ piece of pressure treated wood and bury it into the edge area and using heave duty staples, staple the artificial turf every 6″-8″ inches to the wood.
You can use Nailer Board when you are installing next to asphalt or concrete. Simply use concrete nails to secure the Nailer Board and then the artificial grass can be nailed to the Nailer Board using a nail.
Using six (6″) Galvanized Sod Staples or six (6″) long 60 D Galvanized Nails, preferably with a ribbed or spiral shank. Other acceptable options are landscape spikes, sod staples and timber spikes. Artificial Turf Supply can supply you with staples or nails for your artificial turf supply project, please contact an Artificial Turf Supply representative.
This guide is for the individuals or contractors and turf installers who wish to install their Do It Yourself artificial grass turf project. Artificial Turf Supply makes no representations or warranties regarding the following installation information. This guide is a best effort to installing artificial grass yourself and is not intended for some other specialized artificial turfs, not all results are guaranteed.
Free quote, no strings attached.
Artificial Grass is Our Specialty